
When it comes to your e-commerce store, your visitors and potential customers often assess the value of your photo products, as well as the reliability of your company, via the quality of your visual presentation. In other words, in addition to the visual aesthetic and appearance of your website, how you present your photo products is vital for success.
This is because the quality of your presentation creates the very first impression your customers will have towards your personalised photo products. How do you do this? Through product images, of course! This works because, as it is often claimed:
Furthermore, product photos are a key part in a customer’s decision-making process, which consequently affects their decision to convert and your opportunity to make a sale. This is especially important when it comes to the likes of personalised photo products, which already have a need to be visually beautiful.
You should also remember that, in addition to using them on your website, investing both time and money into creating high quality images is always a good investment, as you can use them for social media and other forms of advertising.
To help you present your products beautifully, we’ve listed some of the most important photography tips for photo product business owners! You can also read more about creating an online presence for your business in this article.
1. Pick the perfect background
When it comes to backgrounds, there’s no one, universal rule for the perfect product photo. Instead, you have a few different options to choose from, with the most popular typically being purely white backgrounds or real-world backdrops.
For the former, creating a completely white background is not as easy as it might first appear, since bends and corners can easily be seen. A good way to achieve a perfect white background is to use a sweep. This is a sheet of white paper, which is large enough for the photograph and slightly bend, without any sharp bends or folds. The bottom of the sheet sits under the product, acting as the surface, but curves up gently into the whitewall behind the product.
As an example of the final outcome, here you can see a personalised blanket with photos, all presented on a white background:
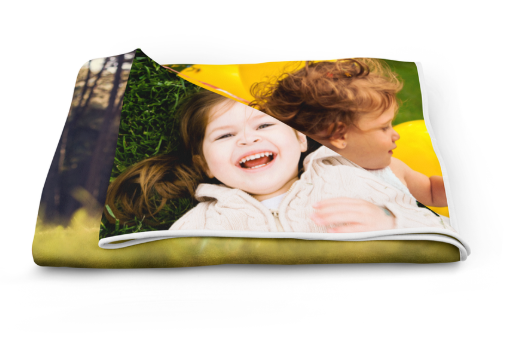
After properly editing the photo, such as increasing the contract and brightening and overall image, the background should look quite white, offering a clean, crisp method of displaying your products.
When it comes to real-world backgrounds, the most suitable situations are when you are shooting personalised products with specific uses. This includes the likes of mugs, phone cases, pillows and shopping bags, which have typical situations you would expect to see them in.
Unfortunately, this also presents a new challenge. In these cases, there is the possibility that the real-world setting will steal the focus away from your product, making customers unsure about which item within the final image is for sale.
Of course, there are ways around this and, below, you can see an example of a highly well-done personalised mousepad photograph, using a real-world scene:
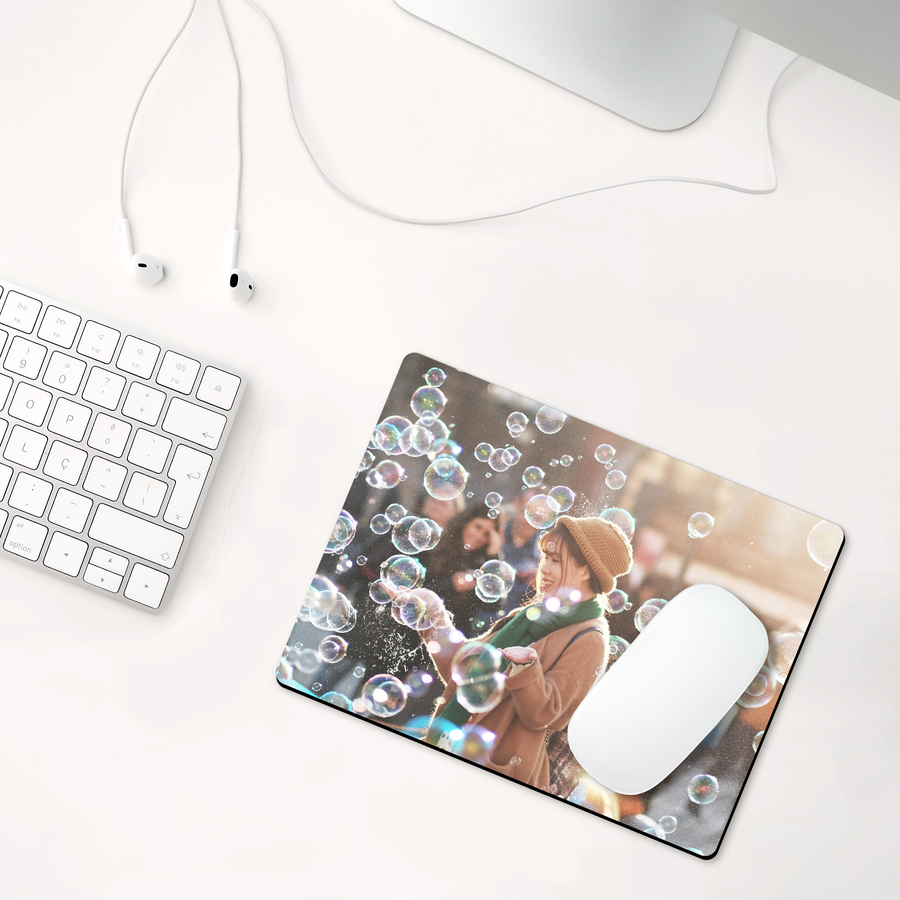
As you can see, it’s vital that you prepare a background that is subdued, free of eye-catching colours and objects that would take attention away from the focal product.
2. Natural or artificial light?
When it comes to photography, natural lighting refers to sunlight, which is also known as “soft” light, due to the fact that the sun casts a large, soft range of light. This can be used for products that are meant to be used outside, such as personalized bags, t-shirts or phone cases. In other words, products that your customers likely intend to use or wear outside.
Artificial lighting, on the other hand, is generated by lamps and is best used for photo products that are typically located inside your customer’s homes or workplace, such as wall clocks, photo books, albums, mugs, pillows and photo calendars.
3. Avoid using filters
When it comes to editing your photographs, your personalised products should look as close as possible to how they will actually look in your customers hands. As a result, while editing photos to improve them is advisable, it is not acceptable to overuse filters and distort natural colours, subsequently altering the appearance of your products.
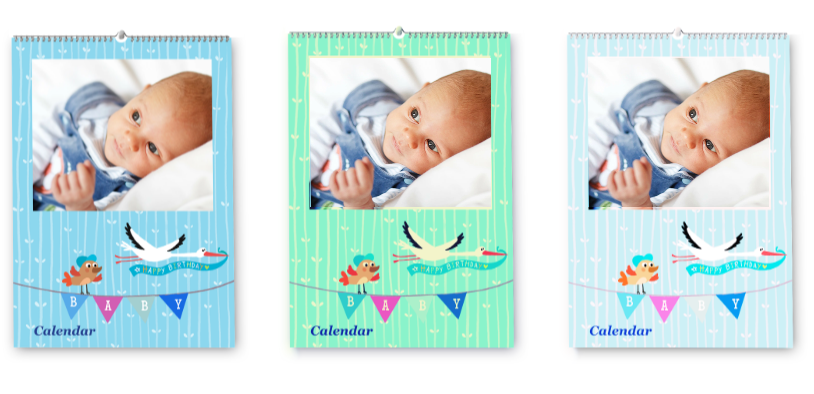
Look at this example of a photo calendar. The first image is the original, while the two photos to the right have been changed with simple filters.
4. Have images for all your product styles
Obviously, you likely sell different types of photo products and will have photographs for each of them, but each product also probably has a few style and options of its own. This can include selling a particular item in various colors, materials, patterns or layouts, for example. Don’t forget to include photographs of all of these options.
It’s important to present images for each possible type to help customers get a clearer idea of the exact product that they want, so include photographs of each possible style.
5. Shoot a variety of images
When you have the ability to take a photograph, don’t just take one or two. It’s important to have a whole series of photographs, from which you can then choose the perfect samples to display.
With a smaller number of photos, there is a greater probability that none of them will be good enough, forcing you to repeat the entire process from the beginning. Additionally, it’s also worth noting that having more than one photograph for each product is always useful. This way, you can take pictures from different perspectives beforehand, choosing the best of each.
6. Don’t delete images until you’ve seen them on a computer
Last but not least, don’t remove photos from your camera until you’ve secured them on your computer. This is because your pictures may not successfully transfer onto the computer and, if you’ve hastily removed them from the camera, then all your work has gone to waste. It’s better to be safe than sorry, so be careful with deleting images prematurely!
While these may all be simple tips, they all make a big difference when it comes to the final outcome. Try to use them as much as possible, to help ensure the best images and presentation for your products.
Katarzyna Michałowska
Reader. Writer. Communicator. PR & Marketing Specialist at Printbox. Learning from only the best and writing killer copy.


